Migrating projects from older versions
Transferring projects from 0.13.x to 0.16.x
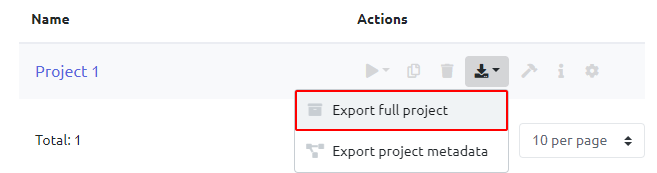
Export projects
This article will help you in the process of migrating projects from an older version to a new one. When switching from version 13.x to 16.x, the user may experience a number of emergency situations, which this instruction will help to avoid:
- Before installing a new version of Varwin (16.x), prefer to export the required projects so that you have a saved working copy handy
- After installing the new version of Varwin, launch it and go to the list of projects
If the installation of a new version of Varwin took place without clearing the data, then we find the necessary project in the list, or we import it from the backup we created earlier
Logic conversion
Next, Varwin needs to convert the logic that was implemented on 13.x to the new version of the platform. To do this, for each scene, perform the following actions:
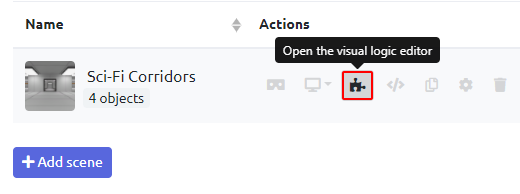
- Go to the project, open the logic editor of one of the scenes
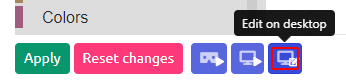
- perform any manipulations on the workspace of the logic editor, for example, move a block - our task is to make the “Apply” button active

- Click on the “Apply” button, thereby starting the logic conversion process
Update objects
Next, you need to update the objects to the latest version - they have been fixed errors, improved performance and added new functionality
- To do this, go to the scene editor
- In the editor window, in the top toolbar, find the button for launching the object versioning widget and click on it

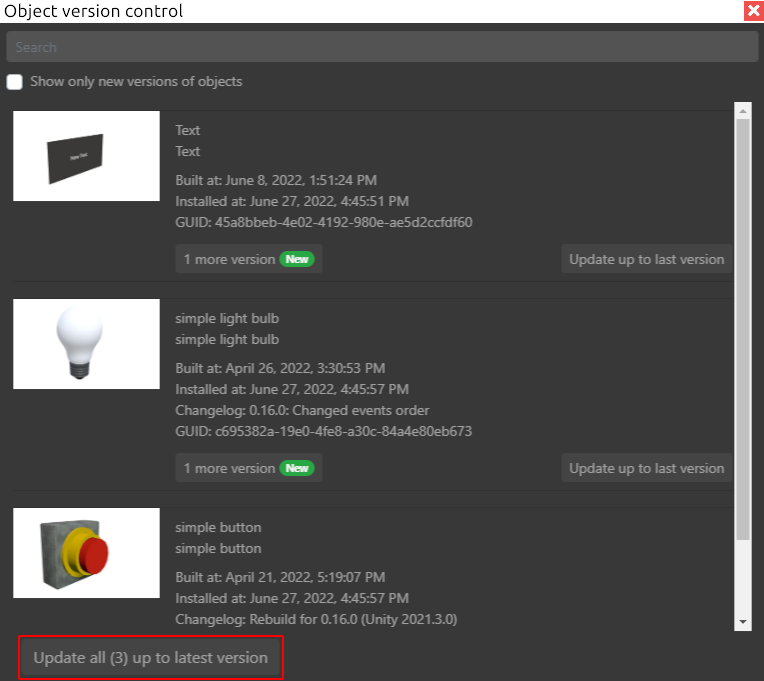
- The Object Versioning window opens. We can update both single selected objects and all at once. In our case, it is recommended to update all objects at once by clicking on the corresponding button. Initially, the list will contain only objects built into the platform. If the project also uses “third-party” objects made using the Varwin SDK it is recommended to rebuild them in Unity and upload them to the platform, more on that below.
- Object updates will take effect only after restarting the scene, so you need to close the versioning widget by clicking on the cross
- And then click on the “OK” button in the window that appears

- Next, you need to restart the scene editor for the changes to take effect. To do this, close the editor window
Fixing object logic
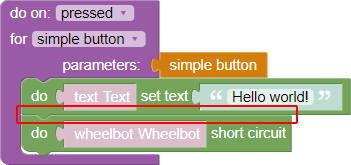
Let’s go back to the scene logic editor in which we updated the objects. After updating the objects, some of their blocks will be marked as deleted, and some as obsolete:
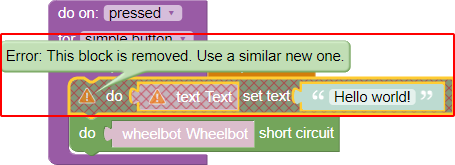
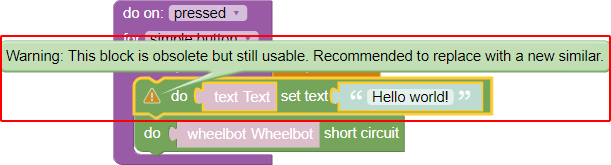
Outdated blocks will continue to work, but correct operation cannot be guaranteed. The next stage of the transfer of projects is the replacement of remote and, if necessary, obsolete blocks. To do this, you need to find a similar block in the list of object blocks and replace the old one with it. On the example of the “Text”:
- We find a similar block
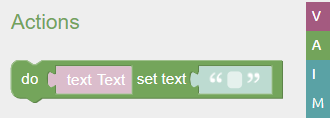
- Drag it to the right place and configure it like the old one
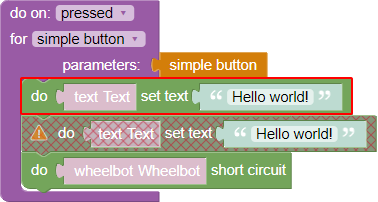
- Delete the old block
- We perform similar operations until there is not a single block marked deleted in the logic editor
To save the progress of replacing blocks, you can use the forced save function - it allows you to save the state of the logic in an inoperative state in order to continue working with it in the future. For this:
- Click the “Apply” button
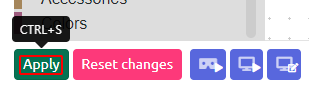
- If deleted blocks remain in the logic editor, the workspace will focus on that block and the “Apply” button will change to “Force Apply”

After clicking on the “Force Apply” button, the current state of the logic will be saved and you can continue working with it in the future
- Once all blocks in the logic editor are restored, the “Apply” button no longer changes to a “Force Apply” button, the project can be considered migrated.
It is also recommended to check the documentation describing the updated behavior of the blocks in the logic editor workspace in order to possibly correct some points of your logic
Rebuilding “custom” objects made with the Varwin SDK
You need to install LTS - version of Unity 2021 (2021.3.0 LTS) and create a new Unity project on this version
It is necessary to collect resources and sources of your objects
If you are using a repository to store resources, you can skip the steps below
- Open the project on Unity 2018, which contains the objects that need to be rebuilt
- Go to the “Project” window and right-click in an empty space, select “Export package…”
- In the window that opens, check the boxes for those folders and resources that need to be transferred
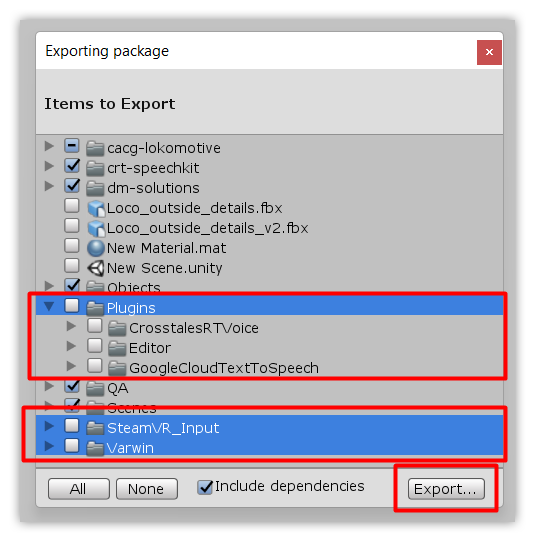
It is necessary to uncheck the “Plugins” folders (if the project uses any plugins other than those in the screenshot, then you need to select only them), “SteamVR_Input”, “Varwin” are the resources of the Varwin SDK 13.x, they are for us won’t be needed
- Click the “Export” button and export the package to a convenient location
- Open a project created on Unity 2021 and install the Varwin SDK for 0.16.x following the instructions for installing the SDK and prompts in pop-up windows
- After installing the SDK, import the package with the sources of objects and resources that were exported from Unity 2018 (or download the resources of objects and scenes from the repository) into the project
- After importing, there may be errors in the console related to changes to the Unity API, they must be resolved according to the Unity documentation
- After a successful import, and if there are no errors in the console, you can collect the objects. This is done in the same way as before. When assembling objects, a window appeared where you can enter what changes were made in comparison with the previous assembly, just some information, or leave the field empty

Next, press the “Build” button and the assembly procedure takes place
- After collecting all the necessary objects and loading them into Varwin, you need to update these objects in the scenes where it is used. The update process is similar to the process described above for embedded objects