This section describes the control features in Varwin XRMS on the Pico Neo 2 and Pico Neo 3 Pro mobile headsets
Pico Neo 2
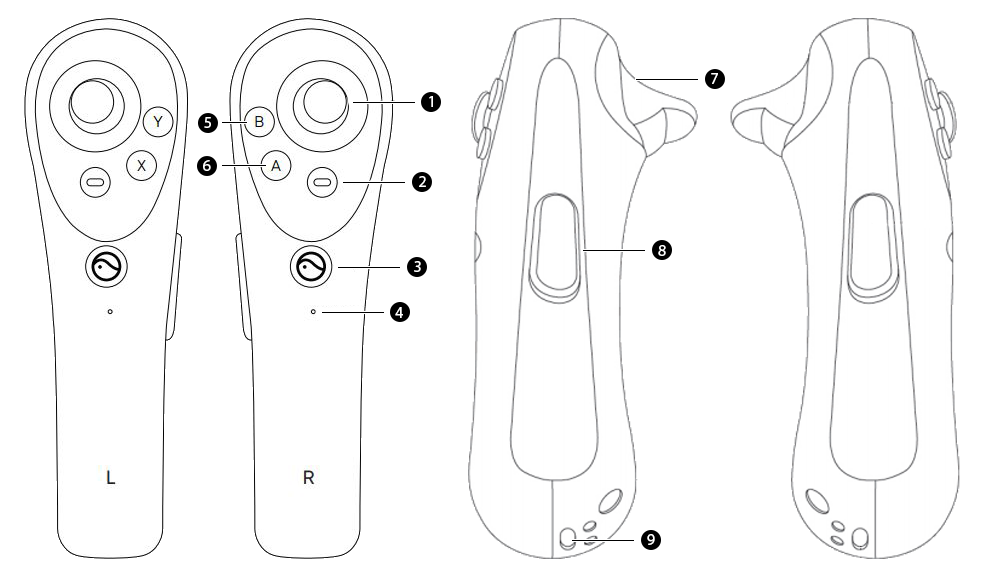
| № | Designation |
|---|
| 1 | Joystick |
| 2 | “Back” button |
| 3 | “Home” button |
| 4 | Status indicator |
| 5 | “Interaction 1” button |
| 6 | “Interaction 2” button |
| 7 | Trigger |
| 8 | “Grab” button |
| 9 | Charging port |
Control
- To teleport, tilt the joystick forward/backward to aim, and release it to teleport
- To discretely rotate left/right, move the joystick to the corresponding side
- To grapple or release an object, press the “Grab” button
- To exit the project to the connection screen, press the “Interaction 1” button
- To call the Pico Neo system menu, press the “Home” button
- To interact with objects and interface elements press the trigger
Pico Neo 3 Pro
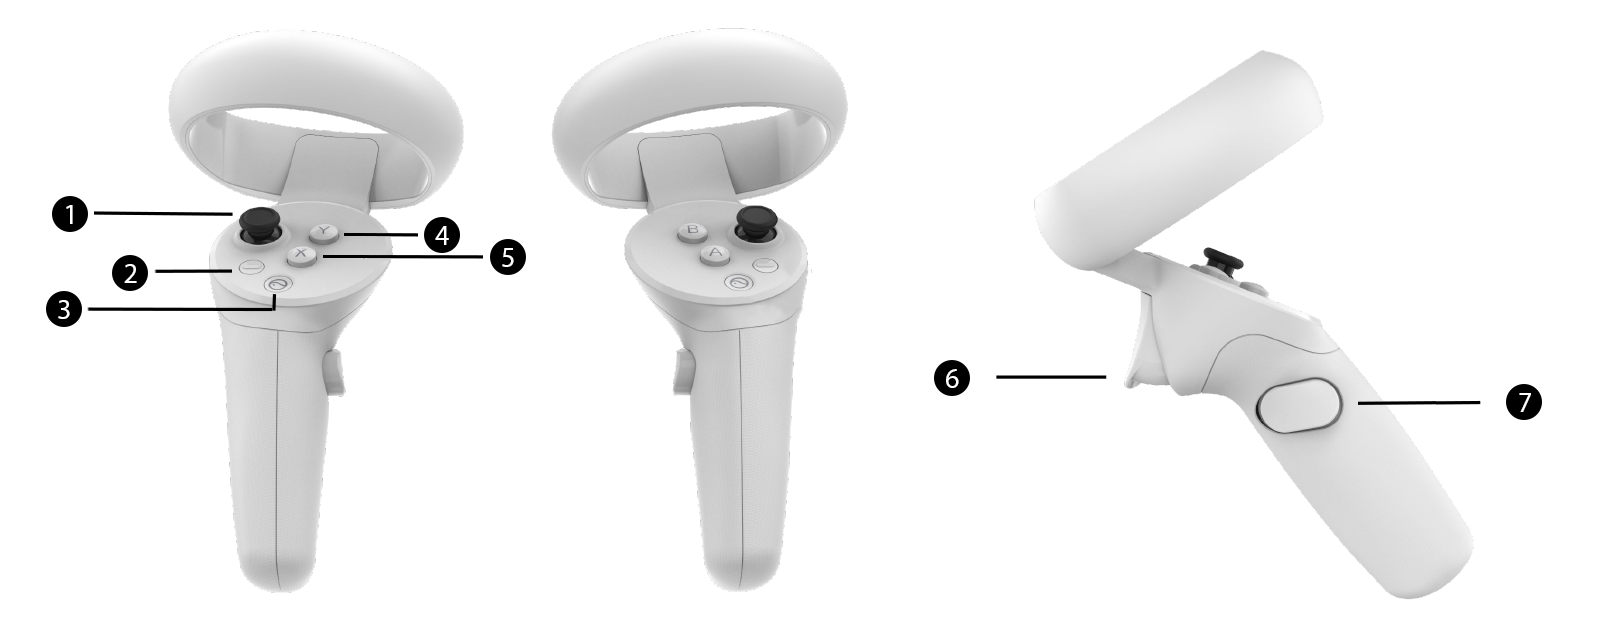
| № | Designation |
|---|
| 1 | Joystick |
| 2 | “Back” button |
| 3 | “Home” button |
| 4 | “Interaction 1” button |
| 5 | “Interaction 2” button |
| 6 | Trigger |
| 7 | “Capture” button |
Control
- To teleport, tilt the joystick forward/backward to aim, and release it to teleport
- To discretely rotate left/right, move the joystick to the corresponding side
- To grapple or release an object, press the “Grab” button
- To exit the project to the connection screen, press the “Interaction 1” button
- To call the Pico Neo system menu, press the “Home” button
- To interact with objects and interface elements press the trigger